
Apr 28, 2026
57 views
How to Connect to Your Minecraft Server (Step-by-Step Guide)
Learn how to connect to your Minecraft server from your billing panel to in-game with this simple step-by-step guide.
How to Connect to Your Minecraft Server (Step-by-Step Guide)
Learn how to connect to your Minecraft server from your billing panel to in-game in just a few minutes.
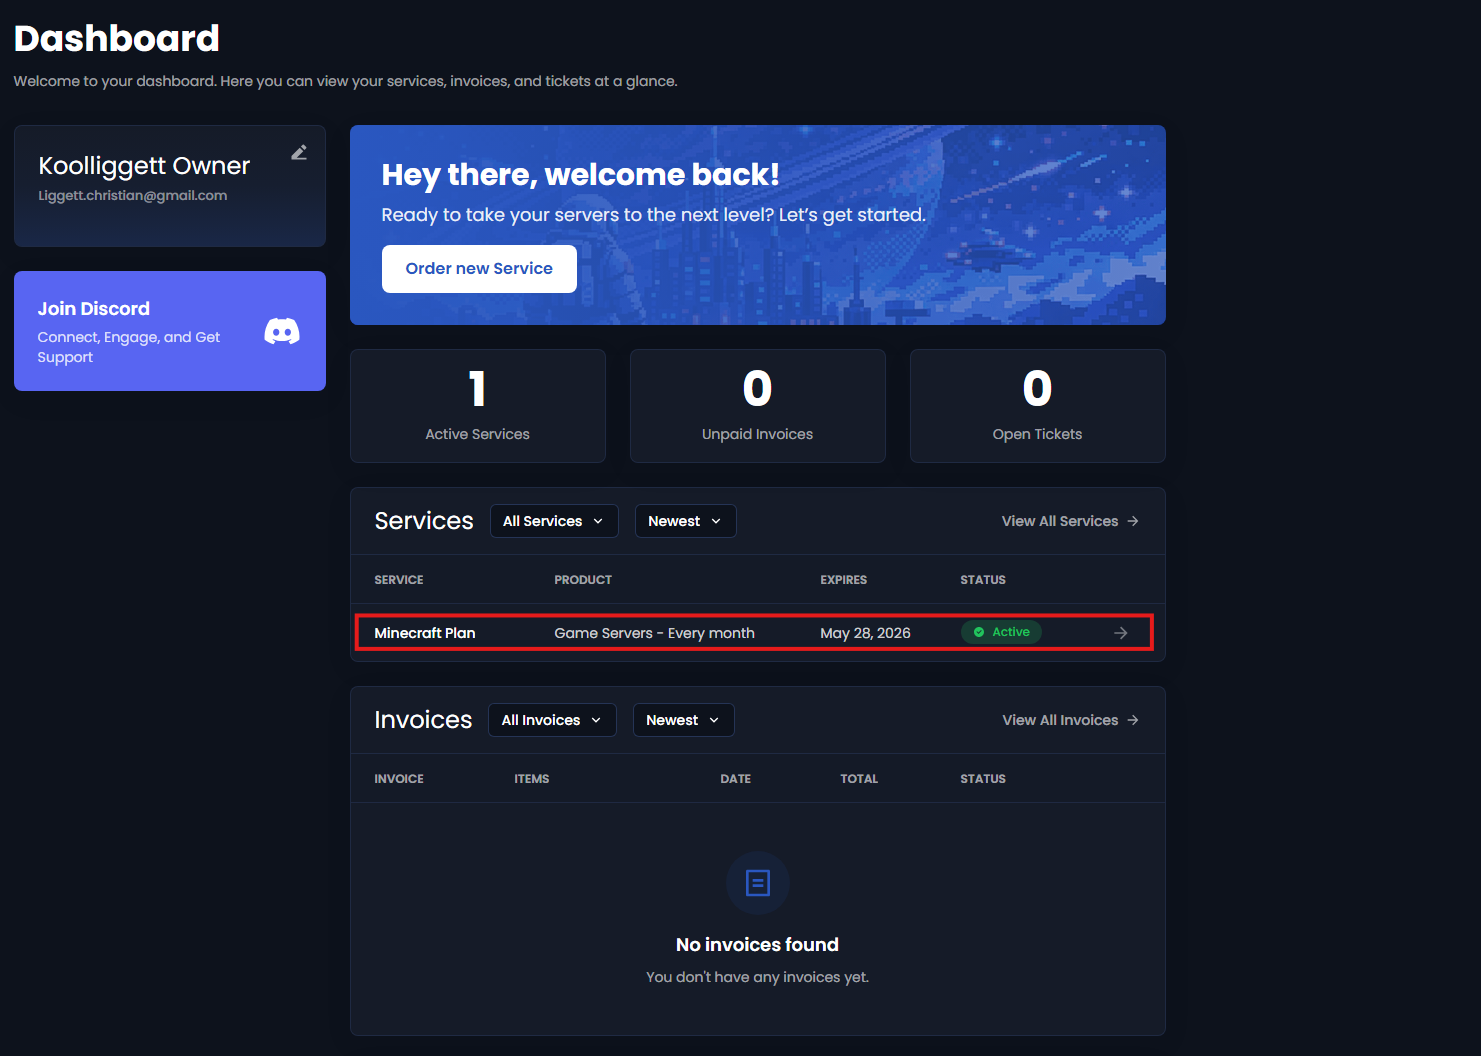
Step 1: Access Your Billing Panel
- Log into your billing dashboard
- Click on Services
- Select your Minecraft Server
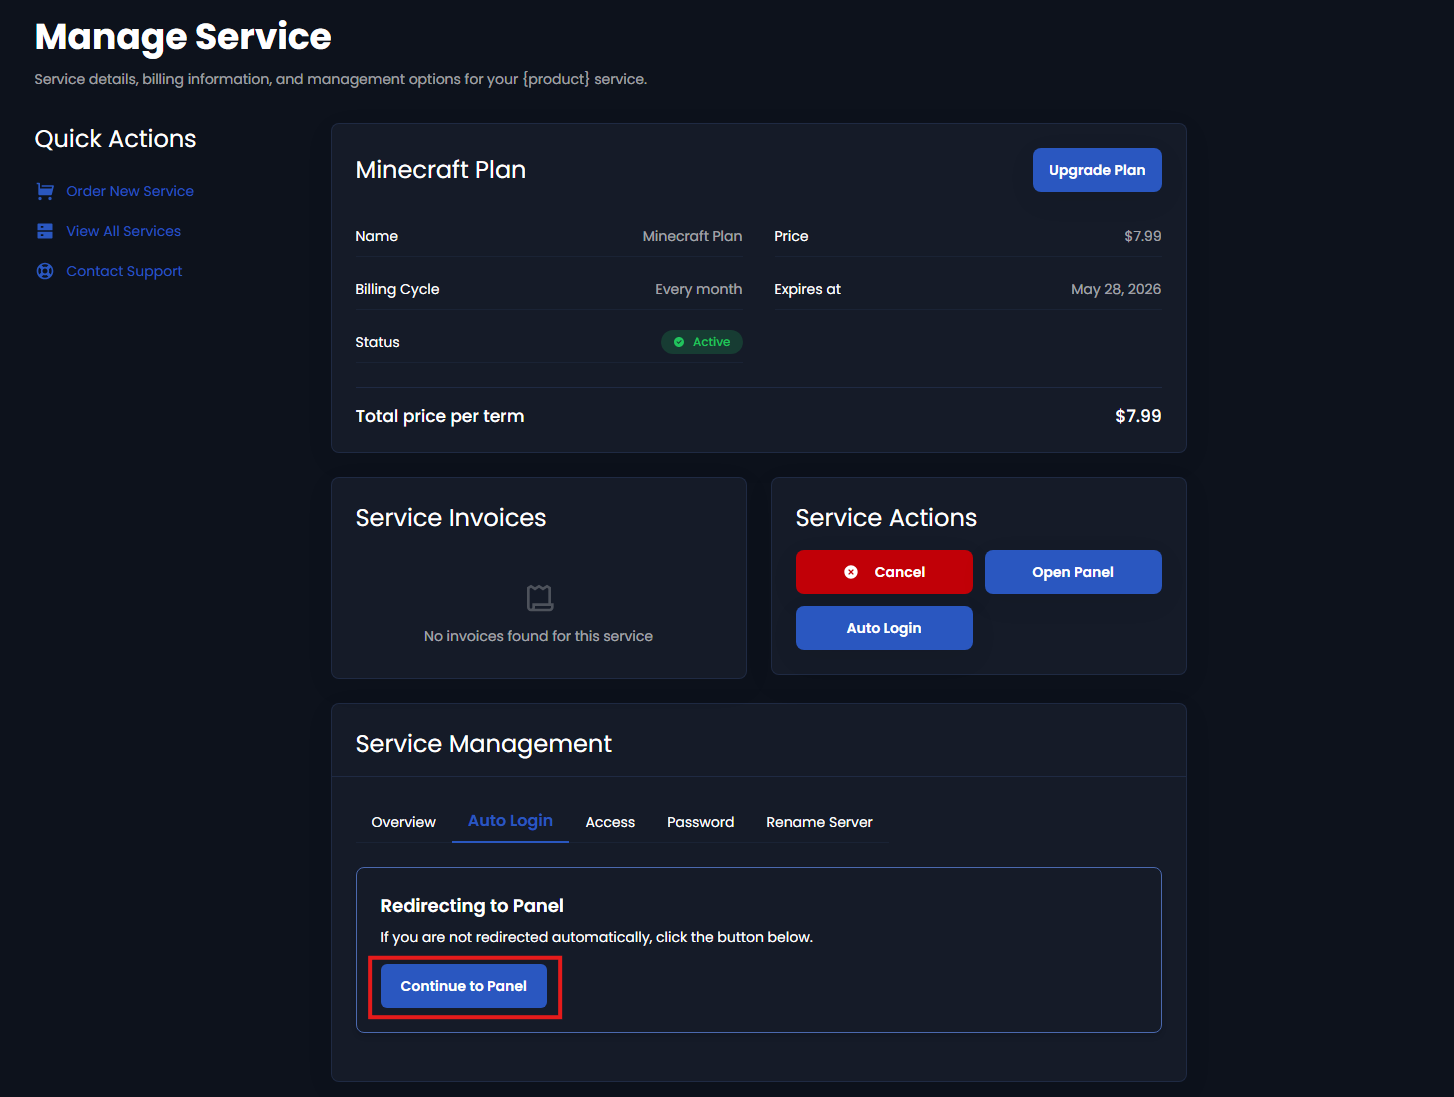
Step 2: Open Your Server Panel
- Click Access or Auto Login
- You will be redirected to your server control panel
Step 3: Start Your Server
- Press the Start button
- Wait until the status shows Online
⚠️ Your server must be online before you can connect
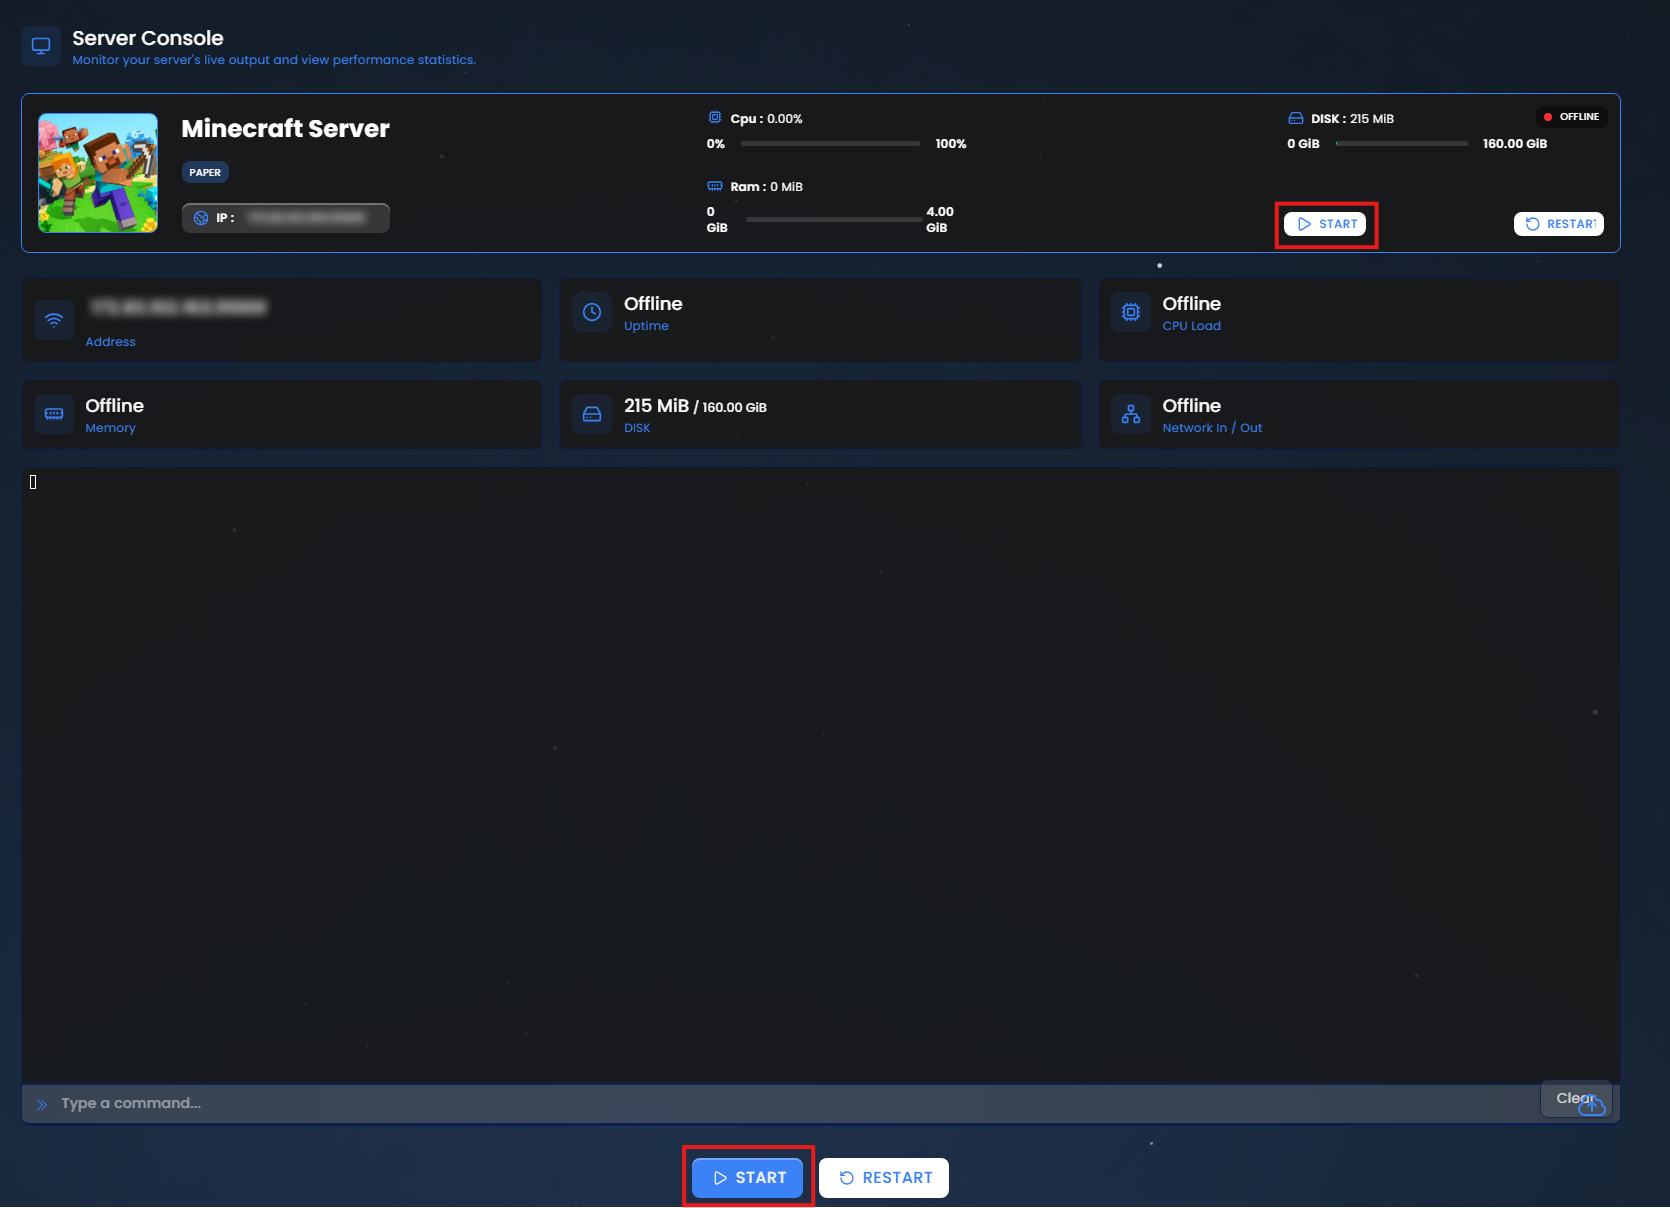
Step 4: Copy Your Server IP Address
Locate your server details in the panel:
- Server Address (IP)
- Port (if shown)
If a port is required, it will look like this:
yourserverIP:25565
Step 5: Open Minecraft
- Launch Minecraft Java Edition
- Click Multiplayer
- Click Add Server
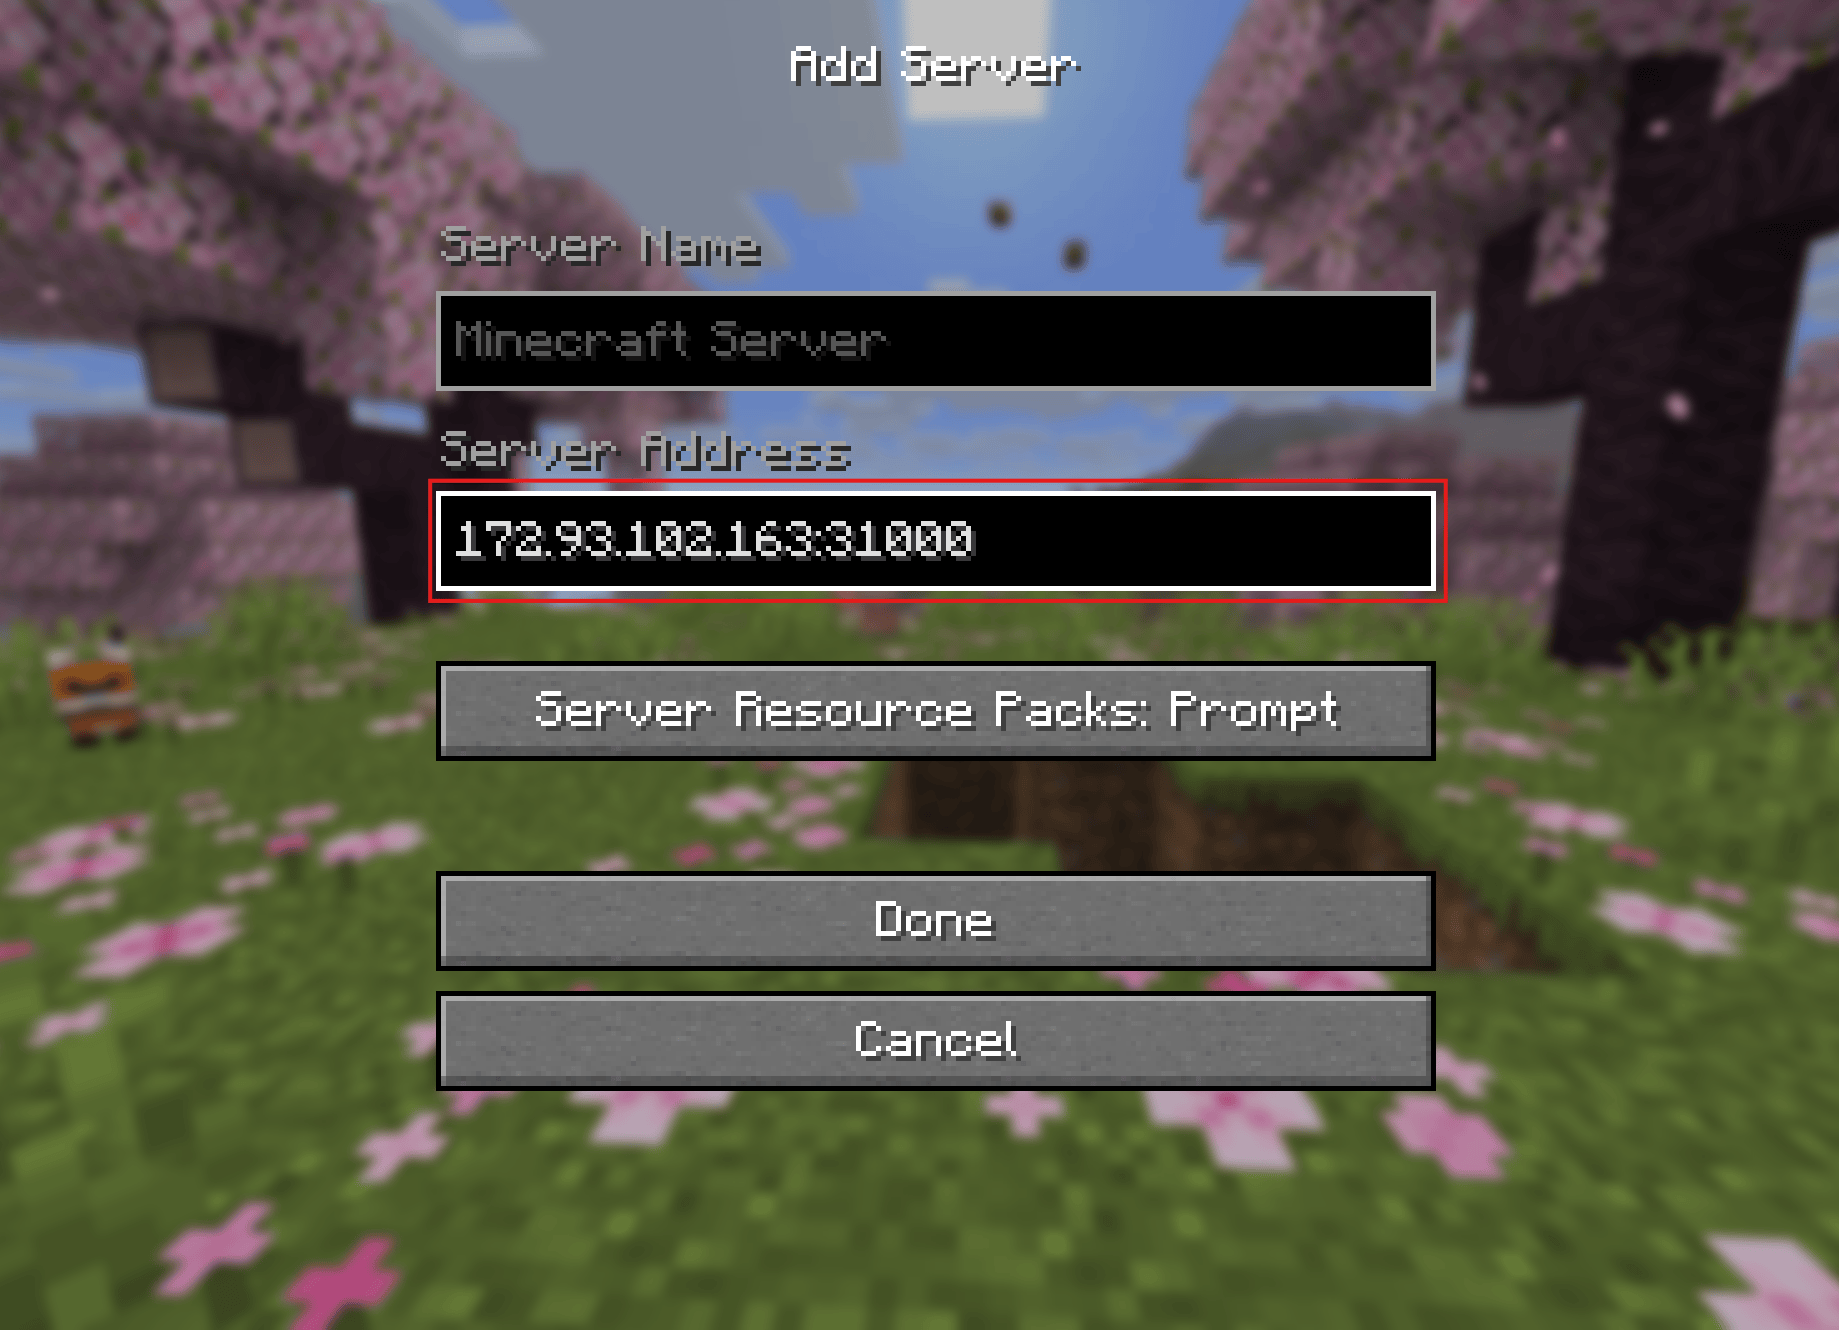
Step 6: Add Your Server
Enter the following:
- Server Name: Anything you want
- Server Address: Paste your server IP
Click Done
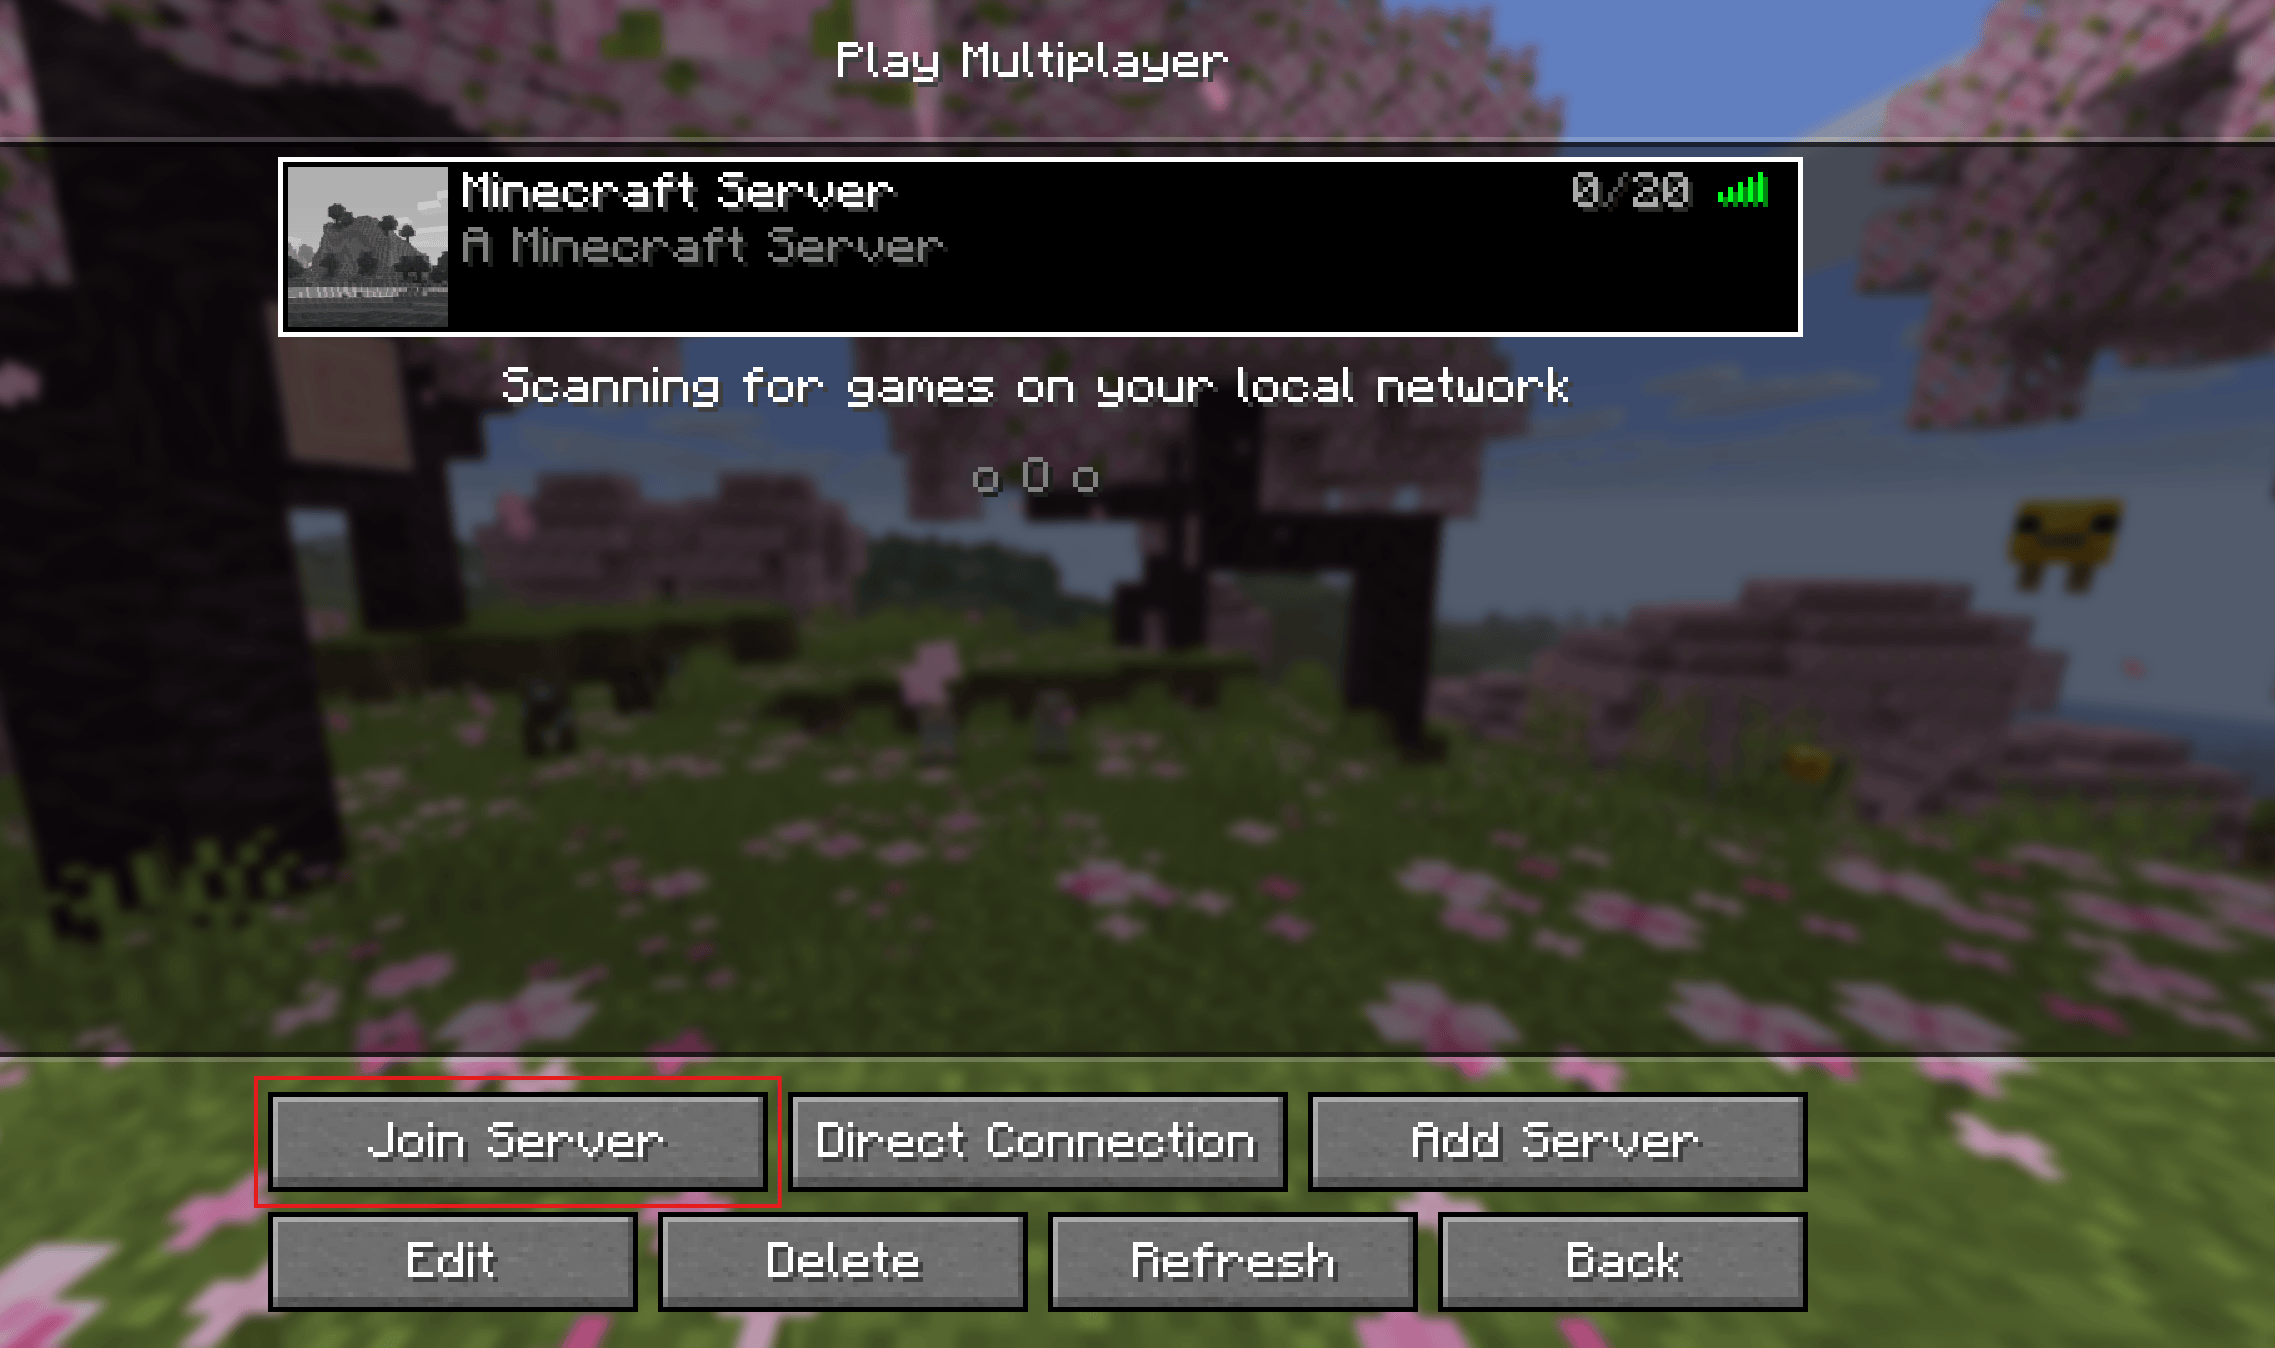
Step 7: Join Your Server
- Select your server from the list
- Click Join Server
🎉 You’re now connected!
Troubleshooting
❌ Server Offline
Make sure your server is running in the panel
❌ Wrong IP Address
Double-check your IP and port
❌ Version Mismatch
Ensure your Minecraft version matches the server version
❌ Connection Timed Out
Try restarting your server or checking firewall/mods
Pro Tips
- Save your server using Add Server
- Bookmark your panel for quick access
- Restart your server after installing mods or plugins
You're Ready!
Your server is now live and ready to play.
If you need help, support is always available.
Need a Server?
Get started today:
https://orbitalhost.xyz